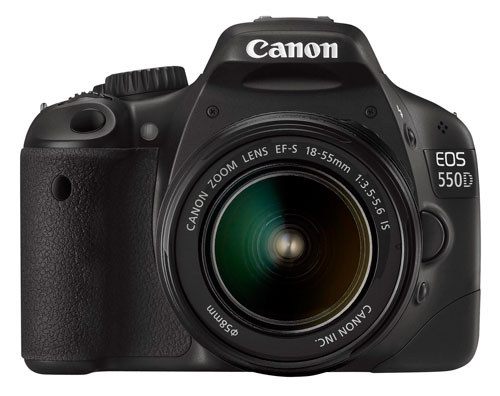
if you think your dslr/camera manual book is useless, think again.
if you are reading this, i will assume you are new to the world of digital photography. that's why you are reading this, right? my intention of doing this post is to guide you with the knowledge that i have gained. i do not claim to be a professional. far from it, i am just an amateur but if i can save you from breaking your first camera, i would.
also take note that i am a Canon user.
therefore, i apologize in advance if i am unable to help my nikon/sony/pentax/olympus friends.
let's begin! :)
- 'unboxing ceremony'
so, what are the important things you should check in that box?
- camera-body or with kit lens, depending on what you bought.
- warranty card to verify that what you bought was the real deal. also look for brand seals (very important)
- extended warranty card (you have to register online to extend your warranty period)
- important accessories such as lens cap, strap and battery. don't forget the cables.
- software and instruction manual CD's
- last but not least-manual booklet
- How to refund?
- everything is intact-no scratches or damages on the goods. the dealer can use it against you to deny a refund. so, make sure everything is spotless, just like how you got it on the first day.
- make sure everything is there-manuals, warranty card, accessories. there's no harm in double-checking.
- make it look as if the goods were untouched. put the plastic covers back and seal it properly. it's not necessary, but it may speed up the refund process
- inevitably, curiosity killed the cat. your curious fingers might have take a shot or two with the camera. simply format the memory card and also the camera. just to be on the safe side.
- Learn to walk before you shoot
but before you do that, go to your study table, switch on that study lamp and open chapter one in the manual book. the manual book contains some valuable information that might save you a trip back to the camera dealer. even if you're never going to switch from Full-Auto mode.
the manufacturers provided you with a thick manual booklet to give you the impression that the equipment you're dealing involves more than just turning the ON/OFF switch.
yes, its necessary to read manual. at least, if you care about your camera or maybe, you're already an expert at handling your dslr. in that case, why are you reading this?
i won't mention everything in this post, that would take too long. i'll just write what i think is important.
- the battery is a virgin, charge it 6-8 hours before using
- Dlsr users, don't expose the insides of the dslr body. there's a complicated system in there which must never be exposed to the outside world. avoid getting dust in because the sensor is very fragile and cleaning it would require some sleepless nights and money. do the right thing, put the body cap on when you're not using it. (i will elaborate on this in another post)
- to attach the lens, find a guide/index that is similar on both the lens and body. align it to find the point of insertion. after that, rotate and you'll hear a click. the lens is now secured to the body. if it requires force to attach the lens, you're doing it wrong. avoid doing this because you may damage the contacts on the rear end of the lens.
- if you're wondering, contact points are the tiny pins with the gold/bronze color. you'll find it on the rear end of then lens and also on the body. why is it important not to scratch the contacts? that's how the lens and body communicate with each other. that's also how the camera is able to autofocus
- if the lens is in AF(autofocus), do NOT attempt to turn the focusing ring. it may disrupt the lens mechanism. in worst-case scenarios, the motor that adjusts the focusing ring might get stuck. in other words, no autofocus since it's stuck.
- condensation will occur when the dslr is transported from the cold into a warn room.to avoid condensation, seal it in a plastic bag before moving it to another room. then let it adjust to the temperature slowly.
- the dslr is an optic precision instrument that requires high-maintenance. in other words, it will make your gold digger girlfriend look like a bargain. i'm talking about filters, lens, crumplers just to name a few. my advice? be prepared with some extra money and don't go cheap on your camera. cheap and photography don't go along. whether it's a hobby or a way to make money, only use the best for your dslr.


2 comments:
Looking into buying a DSLR this year. Thanks for the info bro.
no problem :)
Post a Comment